Virtual Chassis
Configuring Stacking
Example for two switches:
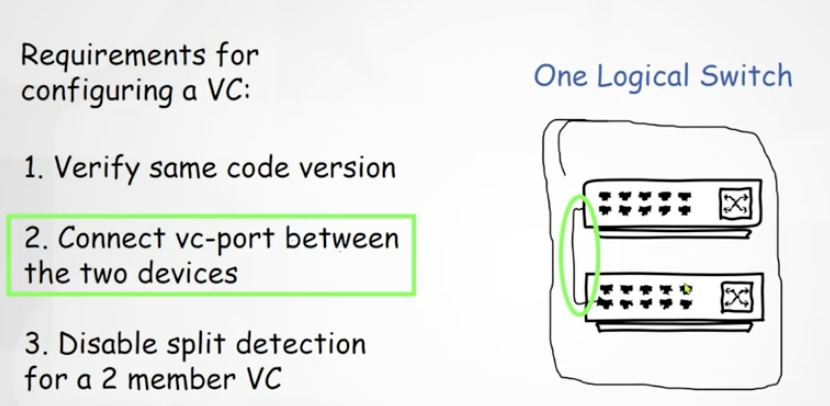
Disabling split detection is optional. If the backup switch went down, by default, the primary switch would transition into a deactivated state because it lost its member. Disabling the behavior will allow the primary device to stay up in case the backup fails. It is strongly recommended for stack setups with only 2 members.
Example config walkthrough.
check code version with
show version
make sure they match
On your master switch of choice:
set virtual-chassis no-split-detection
Choose your port you want to function as the VC port, in this example port 10:
request virtual-chassis vc-port set pic-slot 0 port 10
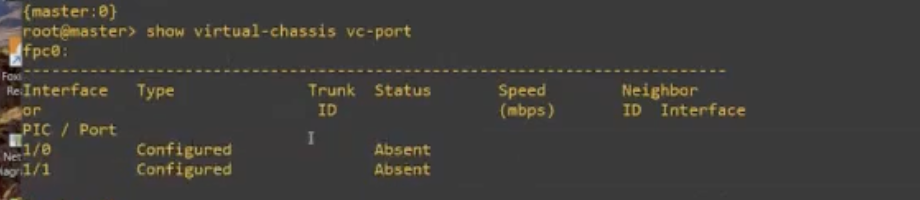
View the status:
show virtual-chassis vc-port
Then console into the second stack member and repeat:
show version
request virtual-chassis vc-port set pic-slot 0 port 10
Then check master:
show virtual-chassis

show interfaces terse
You should see the additional ports 0/0/0 1/0/0 etc.
Stacking more than 2 switches
so the master switch DOESN't need to be connected to all of the other switches, each switch just needs to have one port connected and configured as a VC port to join the existing virtual chassis. Deciding which switch is the master can be decided by the switches automatically or this can be configured manually as seen in a (provisioned) deployment.
Preprovisioned
Have to configure root password, should stop auto upgrade:
set system root-authentication plain-text-password
delete chassis auto-image-upgrade
set system hostname MASTER
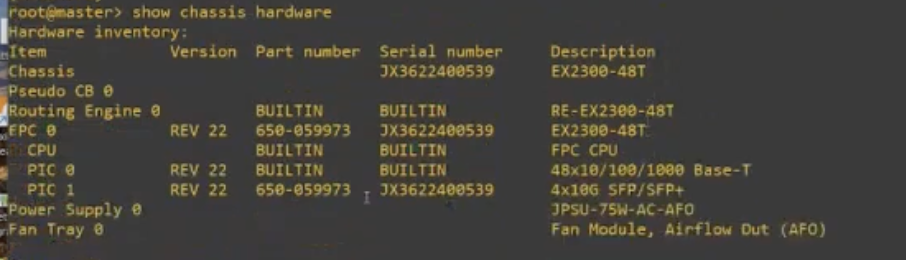
To get the serial number:
show chassis hardware
Then:
set virtual-chassis preprovisioned
set-virtual-chassis no-split-detection
set virtual-chassis member 0 serial-number JX362243523 role routing-engine
For the other member:
set system root-authentication plain-text-password
delete chassis auto-image-upgrade
set system hostname BACKUP
commit
run show version
run show chassis hardware
Once you grab the serial and confirm the firmware is the same, go back to the master switch:
set virtual-chassis member 1 serial-number JX3622400583 role routing-engine
commit
Check status:
show virtual-chassis
Enable both VC ports on the master, here you can see that pic-slot 1 is the SFP ports:
request virtual-chassis vc-port set pic-slot 1 port 0
request virtual-chassis vc-port set pic-slot 1 port 1
 Cable still needs connected
Configure the backup switch:
set virtual-chassis no-split-detection
commit
exit
request virtual-chassis vc-port set pic-slot 1 port 0
request virtual-chassis vc-port set pic-slot 1 port 1
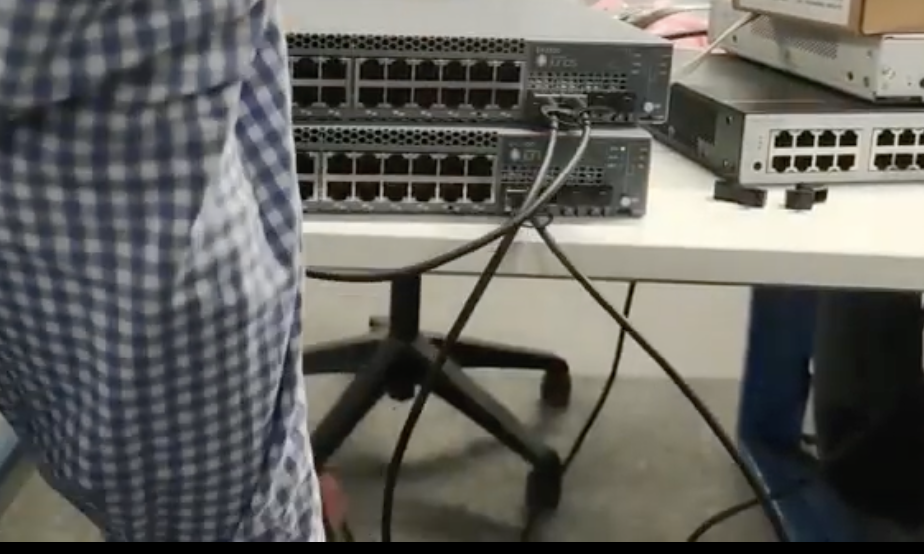
Connect the DAC Cables:
He did 0-0 and 1-1:
Logged in as root, used cli
show virtual-chassis vc-port
show virtual-chassis

show interfaces should show all ports
Configure the commit synchronize command to synchronize the commit command in multiple routing engines in the same chassis:
set system commit synchronize
commit synchronize
Configure primary routing engine to failover without interuption to packet forwarding:
set chassis aggregated-devices ethernet device-count 2
Three Switches
First sign in as root, then:
cli
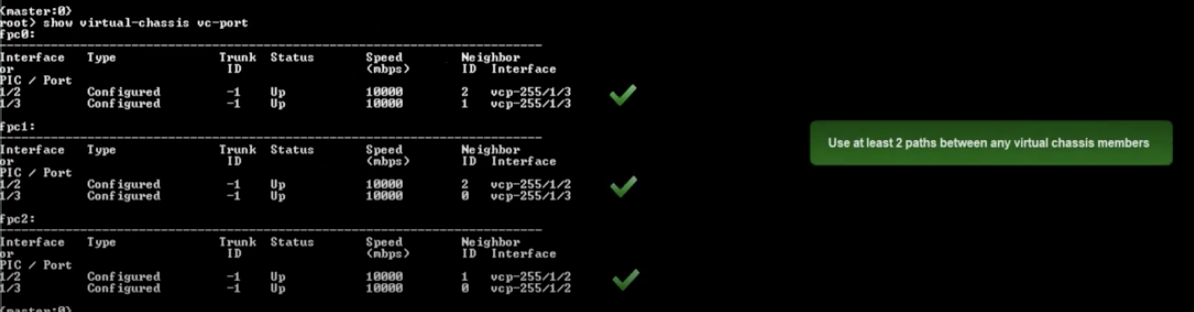
show virtual-chassis vc-port
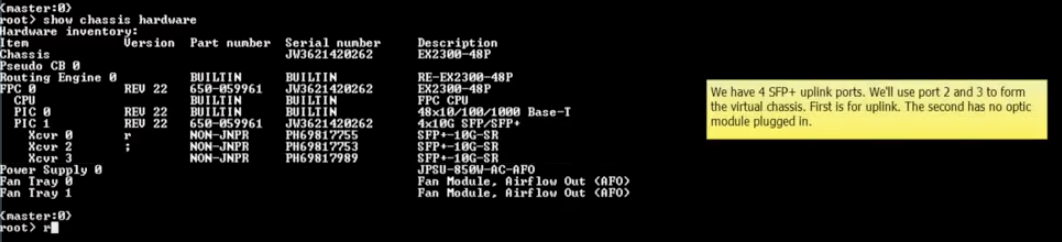
show chassis hardware
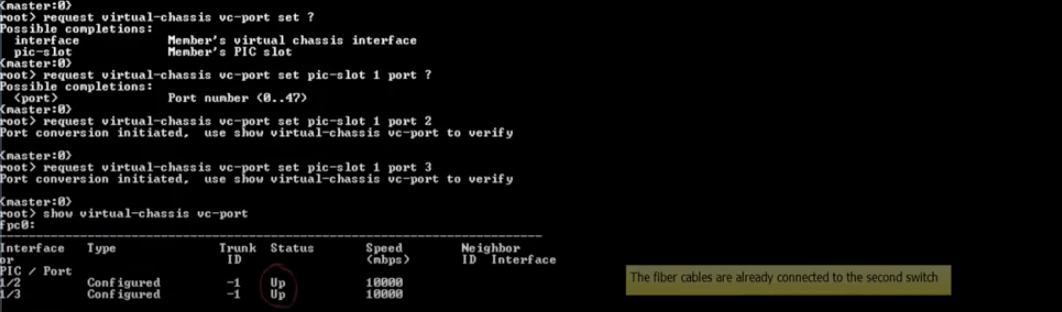
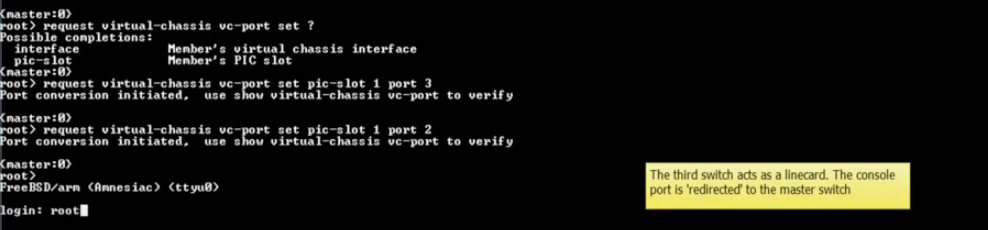
request virtual-chassis vc-port set pic-slot 1 port 2
request virtual-chassis vc-port set pic-slot 1 port 3
show virtual-chassis vc-port
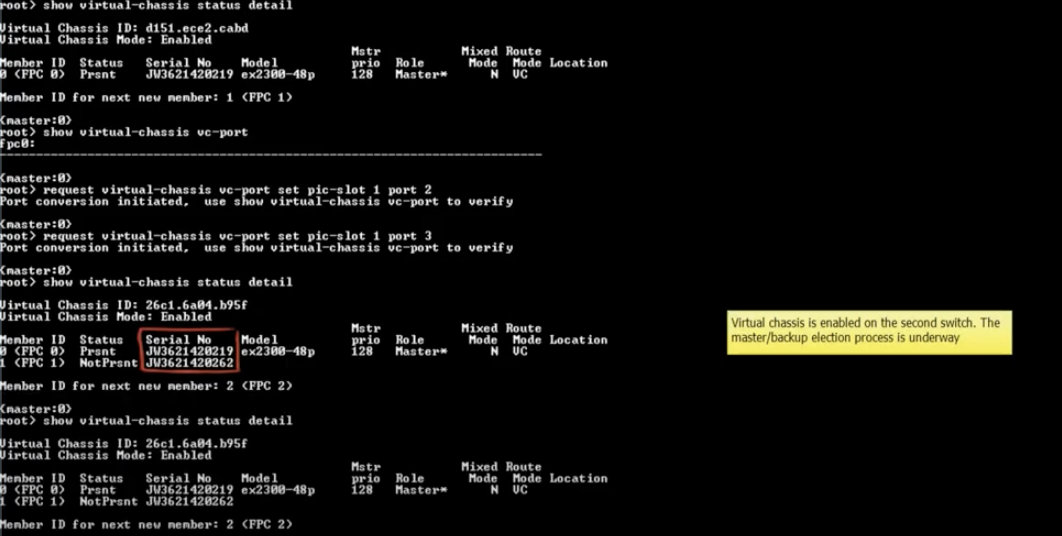
Go into the second switch:
cli
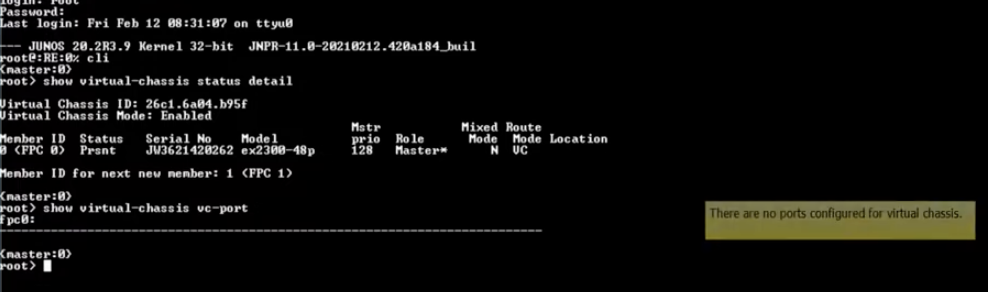
show virtual-chassis status detail
show virtual-chassis vc-port
request virtual-chassis vc-port set pic-slot 1 port 2
request virtual-chassis vc-port set pic-slot 1 port 3
show virtual-chassis status detail

Go into the third switch:
cli
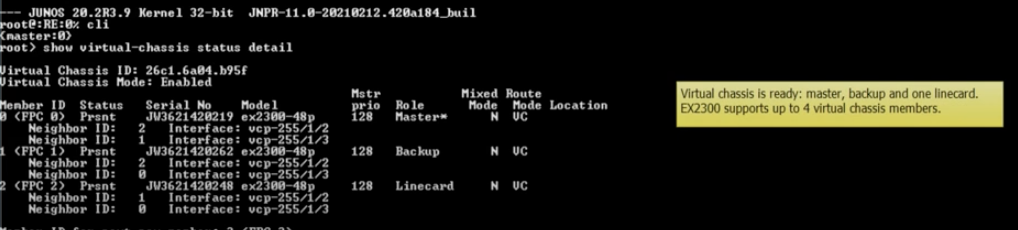
show virtual-chassis status detail
request virtual-chassis vc-port set pic-slot 1 port 3
request virtual-chassis vc-port set pic-slot 1 port 2
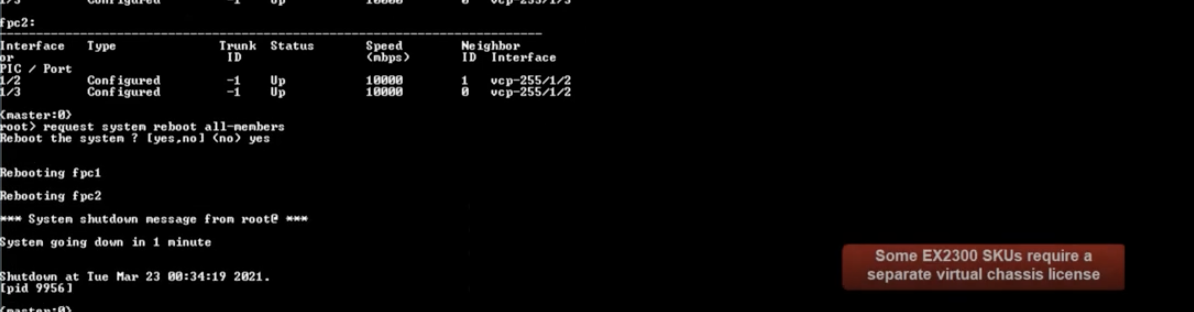
Reboot with
request system reboot all-members