Configuring a New Junos Device
Recovering the password for the root account
- Connect to the console port.
- Reboot the switch.
- Press space to interrupt the boot process when prompted.
- In the bootloader prompt, enter
boot -sto boot into single user mode. - Run the recovery script as prompted with
recovery - Now from the CLI,
set system root-authentication plain-text-password commit and-quit
Factory Reset
Simple factory reset - resets everything except root password:
load factory default
Full factory reset (takes a long time):
request system zeroize
The host name will be "Amnesiac" when JunOS boots without a config, running with the default configuration.
Login with the root account, no password needed. You have to configure a root account password before you can commit, and root account is only used for console use.
Enter the JunOS CLI to exit the FreeBSD shell:
cli
Set some basic config, non root account needed to be able to log in with SSH:
set system host-name LabSwitch
set system root-authentication plain-text-password
set system login user admin class super-user
Updating JunOS
Get model number:
show system information
OR
show chassis hardware
Search for "JTAC Recommended" firmware for each device online and use that version. Download with service contract/Juniper account.
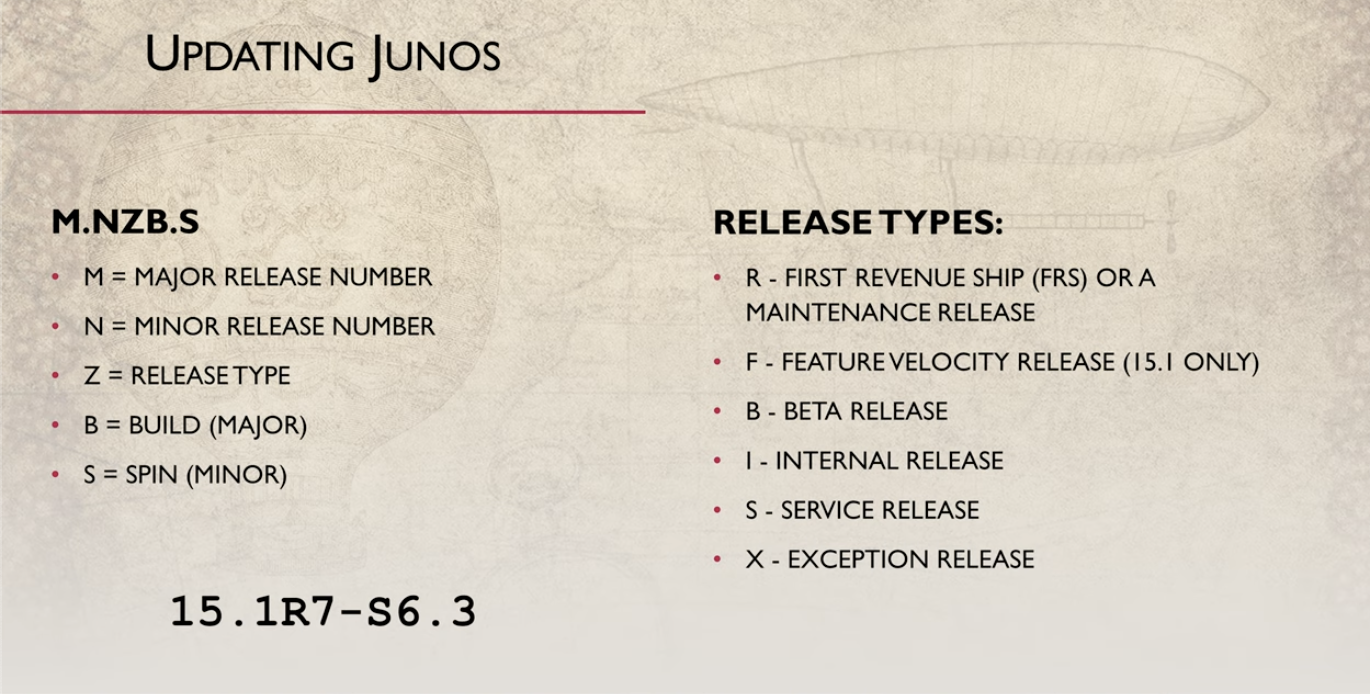
Versioning Format:
Configure some networking to be able to get to FTP server (this appears to be old style pre ELS):
set interfaces vlan unit 10 family inet address 192.168.200.250/24
set vlans Data vlan-id 10
set vlans Data l3-interface vlan.10
set interfaces ge-0/0/8 unit 0 family ethernet-switching vlan members Data
commit
ping 192.168.200.11
Clear some space if needed
request system storage cleanup dry-run
Copy the image from FTP:
file copy ftp://user:password@192.168.200.1/jinstall-ex-2200.15.13-signed.tgz /var/tmp/
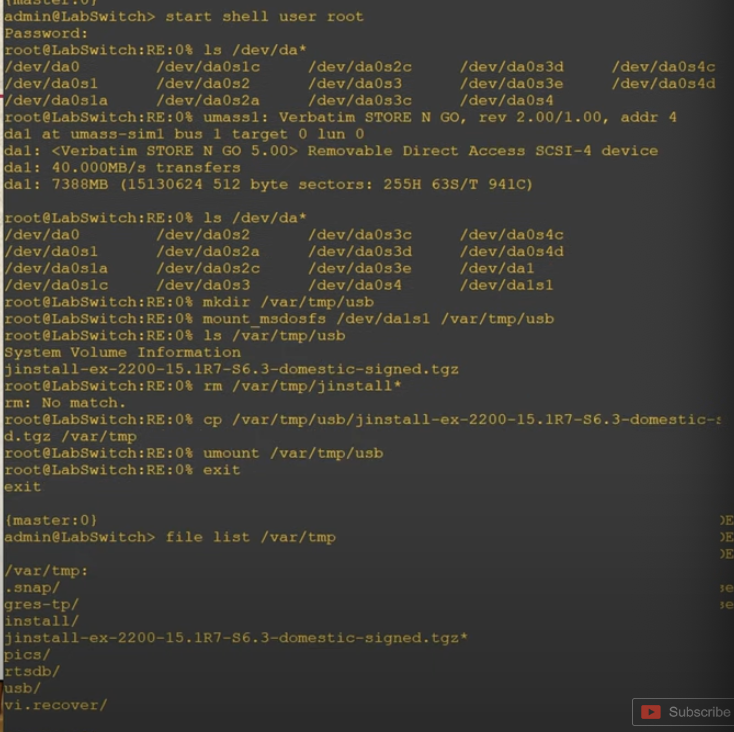
If you have to update via USB:
start shell user root
ls /dev/da*
Compare, then put USB in to find it, mount, copy, remove:
Install
request system software add FILENAME [validate] [reboot]
If you need to manually reboot:
request system reboot
Cisco iOS uses a compressed image file loaded into memory as the device is loaded up.
Juniper loads files into memory as required from disk.
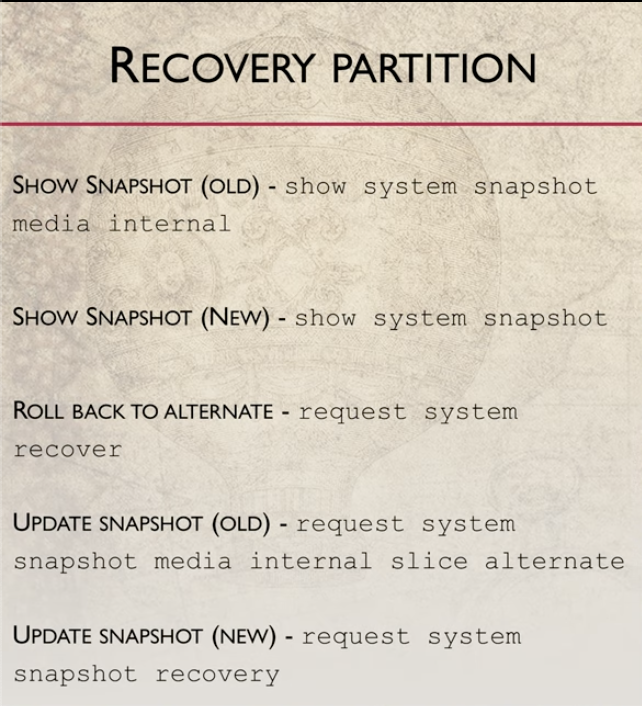
To help handle corruption, Juniper uses a primary and alternate partition.
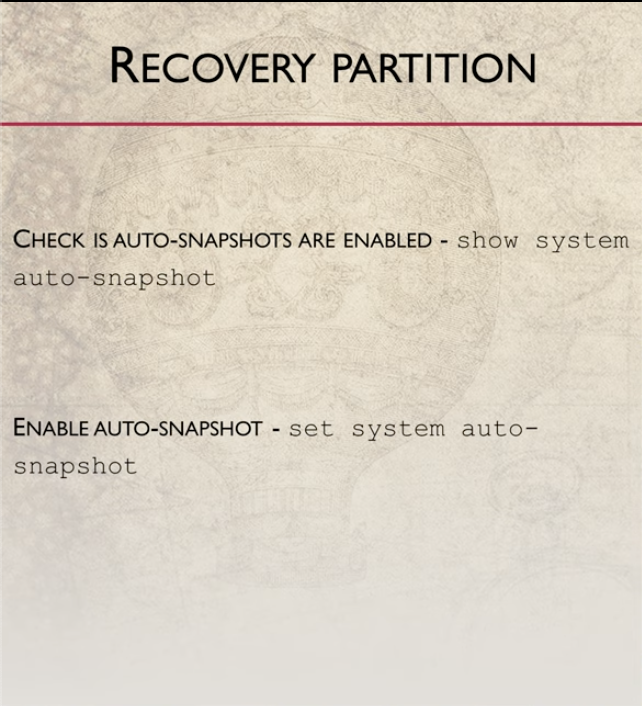
Auto Snapshot:
Part 2:
Configure Management
Out of Band:
configure
set interfaces me0 unit 0 family inet address 10.0.0.1/24
In Band request a VLAN to bind the IP to:
set interfaces irb unit x family inet address x.x.x.x/x
Configure DNS:
set system name-server 1.1.1.1
If you get an error, you might have to delete the dhcp config - you can't have both.
Set date:
set date YYYYMMDHHMM.ss
Or NTP:
set system ntp server pool.ntp.org
SNMP:
set snmp community private authorization read-only
Optionally configure traps:
set snmp trap-group <name> target x.x.x.x
Trap Categories:
set snmp trap-group <name> categories <type>
Enable SSH:
set system services ssh
Enable JWeb:
set system services web-management https system-generated-certificate
commit and-quit
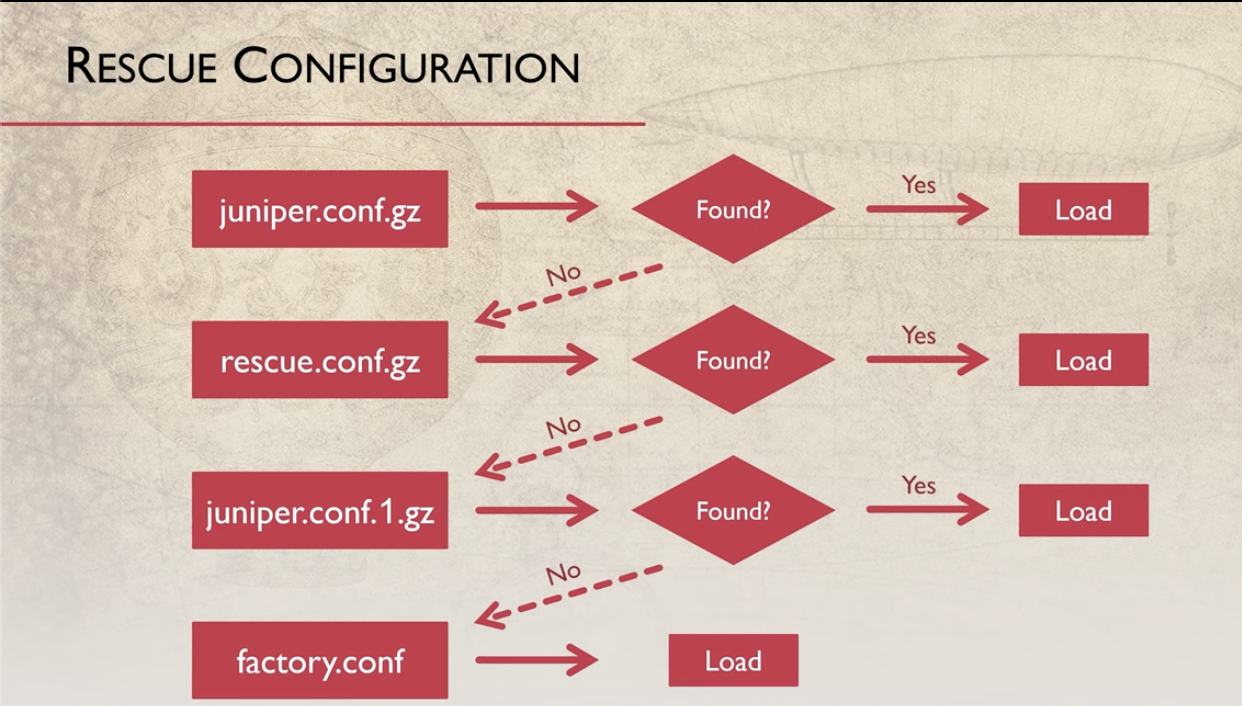
Rescue Configuration
There is an additional config backup called the rescue file in /config.
If the regular config file is missing, it will load the rescue config.
You can also manually load it to buy time to get to a known working config.
Create a rescue config:
request system configuration rescue save
See the rescue config:
show system configuration rescue
Rollback to rescue config:
rollback rescue
And commit.
Importing Configuration
You can't just copy and paste a show run into configuration mode like Cisco because Juniper uses hierarchial commands. You have to first back up the configuration through FTP or show configuration notepad copy, then:
load merge terminal
This tells Juniper to expect structured data. Paste in the config, then press Cntrl-D when done. This is now part of the candidate config which can be committed.
load merge override
Would override the config instead of merge.
Another thing you can do is view the config with set commands with the following:
show configuration | display set
This would allow you to copy into configuration mode like a Cisco device.
To save an output to disk:
show | display set | save /var/tmp/export.txt
Check a configuration file:
test configuration FILENAME